Confluence
Load data from Confluence
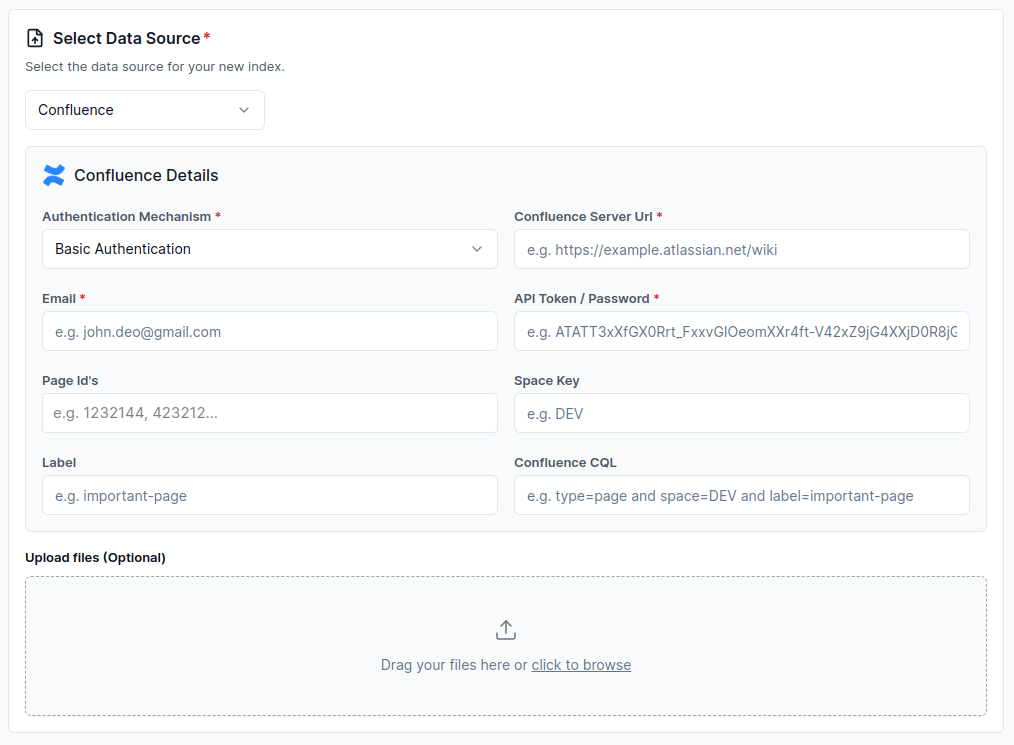
Configure via UI
Basic Authentication

Configure via API / Client
- Python Client
- TypeScript Client
from llama_cloud.types import CloudConfluenceDataSource

ds = {
  'name': '<your-name>',
  'source_type': 'CONFLUENCE',
  'component': CloudConfluenceDataSource(
      server_url: '<server_url>',
      user_name: '<user_name>',
      api_token: '<api_token>',
      space_key: '<space_key>', # Optional
      page_ids: '<page_ids>', # Optional
      cql: '<cql>', # Optional
      label: '<label>', # Optional
  )
}
data_source = client.data_sources.create_data_source(request=ds)
const ds = {
  'name': '<your-name>',
  'sourceType': 'CONFLUENCE',
  'component': {
      'server_url': 'server_url',
      'user_name': '<user_name>',
      'api_token': '<api_token>',
      'space_key': '<space_key>', // Optional
      'page_ids': '<page_ids>', // Optional
      'cql': '<cql>',     // Optional
      'label': '<label>', // Optional
  }
};

const dataSource = await client.dataSources.createDataSource({
body: ds
});
Guide to create an OAuth 2.0 token:
A step-by-step guide to creating an OAuth 2.0 token and using it to fetch data from a Confluence space. It includes instructions on setting up an OAuth 2.0 app in the Atlassian Developer Console, obtaining an access token, and making API requests using the token.
1. Prerequisites
- An Atlassian account.
- Access to the Atlassian Developer Console.
- Basic knowledge of OAuth 2.0 and API requests.
- A Confluence account with the necessary permissions.
2. Setting Up the OAuth 2.0 App
- Go to the Atlassian Developer Console.
- Log in with your Atlassian account.
- Click on your profile icon in the top-right corner and select
Developer console. - Click on
Create app. - Enter the app name and click
Create. - In your app's settings, go to
Authorizationin the left menu. - Next to OAuth 2.0 (3LO), click
Configure https://auth.atlassian.com/oauth/token. - Enter the Callback URL (this is the URL that will handle the OAuth callback).
- Click
Save changes. - Go to
Permissionsin the left menu. - Next to the Confluence API, click
Add. - Select the necessary scopes (e.g., read:confluence-space.summary).
3. Implementing OAuth 2.0 (3LO) in Your App
- Direct the User to the Authorization URL:
https://auth.atlassian.com/authorize?audience=api.atlassian.com&client_id=YOUR_CLIENT_ID&scope=read:confluence-space.summary&redirect_uri=YOUR_APP_CALLBACK_URL&state=YOUR_USER_BOUND_VALUE&response_type=code&prompt=consent
-
Replace the placeholders with the appropriate values:
YOUR_CLIENT_ID: The client ID of your app.YOUR_APP_CALLBACK_URL: The callback URL configured in your app settings.YOUR_USER_BOUND_VALUE: A unique value to maintain state between the request and callback.
-
Exchange the Authorization Code for an Access Token:
Once the user grants access, they will be redirected to your callback URL with an authorization code. Use this code to obtain an access token:
curl --request POST \
     --url 'https://auth.atlassian.com/oauth/token' \
     --header 'Content-Type: application/json' \
     --data '{
     "grant_type": "authorization_code",
     "client_id": "YOUR_CLIENT_ID",
     "client_secret": "YOUR_CLIENT_SECRET",
     "code": "YOUR_AUTHORIZATION_CODE",
     "redirect_uri": "YOUR_APP_CALLBACK_URL"
}'
Replace the placeholders with the appropriate values:
YOUR_CLIENT_ID: The client ID of your app.YOUR_CLIENT_SECRET: The client secret of your app.YOUR_AUTHORIZATION_CODE: The authorization code received from the callback.YOUR_APP_CALLBACK_URL: The callback URL configured in your app settings.
4. Fetching Data Using the Access Token:
-
Get the Cloud ID: Use the access token to get the cloud ID for your Confluence site:
curl --request GET \
     --url 'https://api.atlassian.com/oauth/token/accessible-resources' \
     --header 'Authorization: Bearer YOUR_ACCESS_TOKEN' \
     --header 'Accept: application/json'
Replace
YOUR_ACCESS_TOKENwith the actual access token received in the previous step. -
Read the Space: Use the cloud ID and access token to make a request to read the space:
curl --request GET \
     --url 'https://api.atlassian.com/ex/confluence/CLOUD_ID/rest/api/space' \
     --header 'Authorization: Bearer YOUR_ACCESS_TOKEN' \
     --header 'Accept: application/json'
User Inputs: Replace the placeholders with the appropriate values:•
CLOUD_ID: The cloud ID of your Confluence site.YOUR_ACCESS_TOKEN: The actual access token received in the previous step.