No-code UI
Core workflows via the no-code UI.
Create new index
Navigate to Index feature via the left navbar.

Click Create a new pipeline button. You should see a index configuration form.
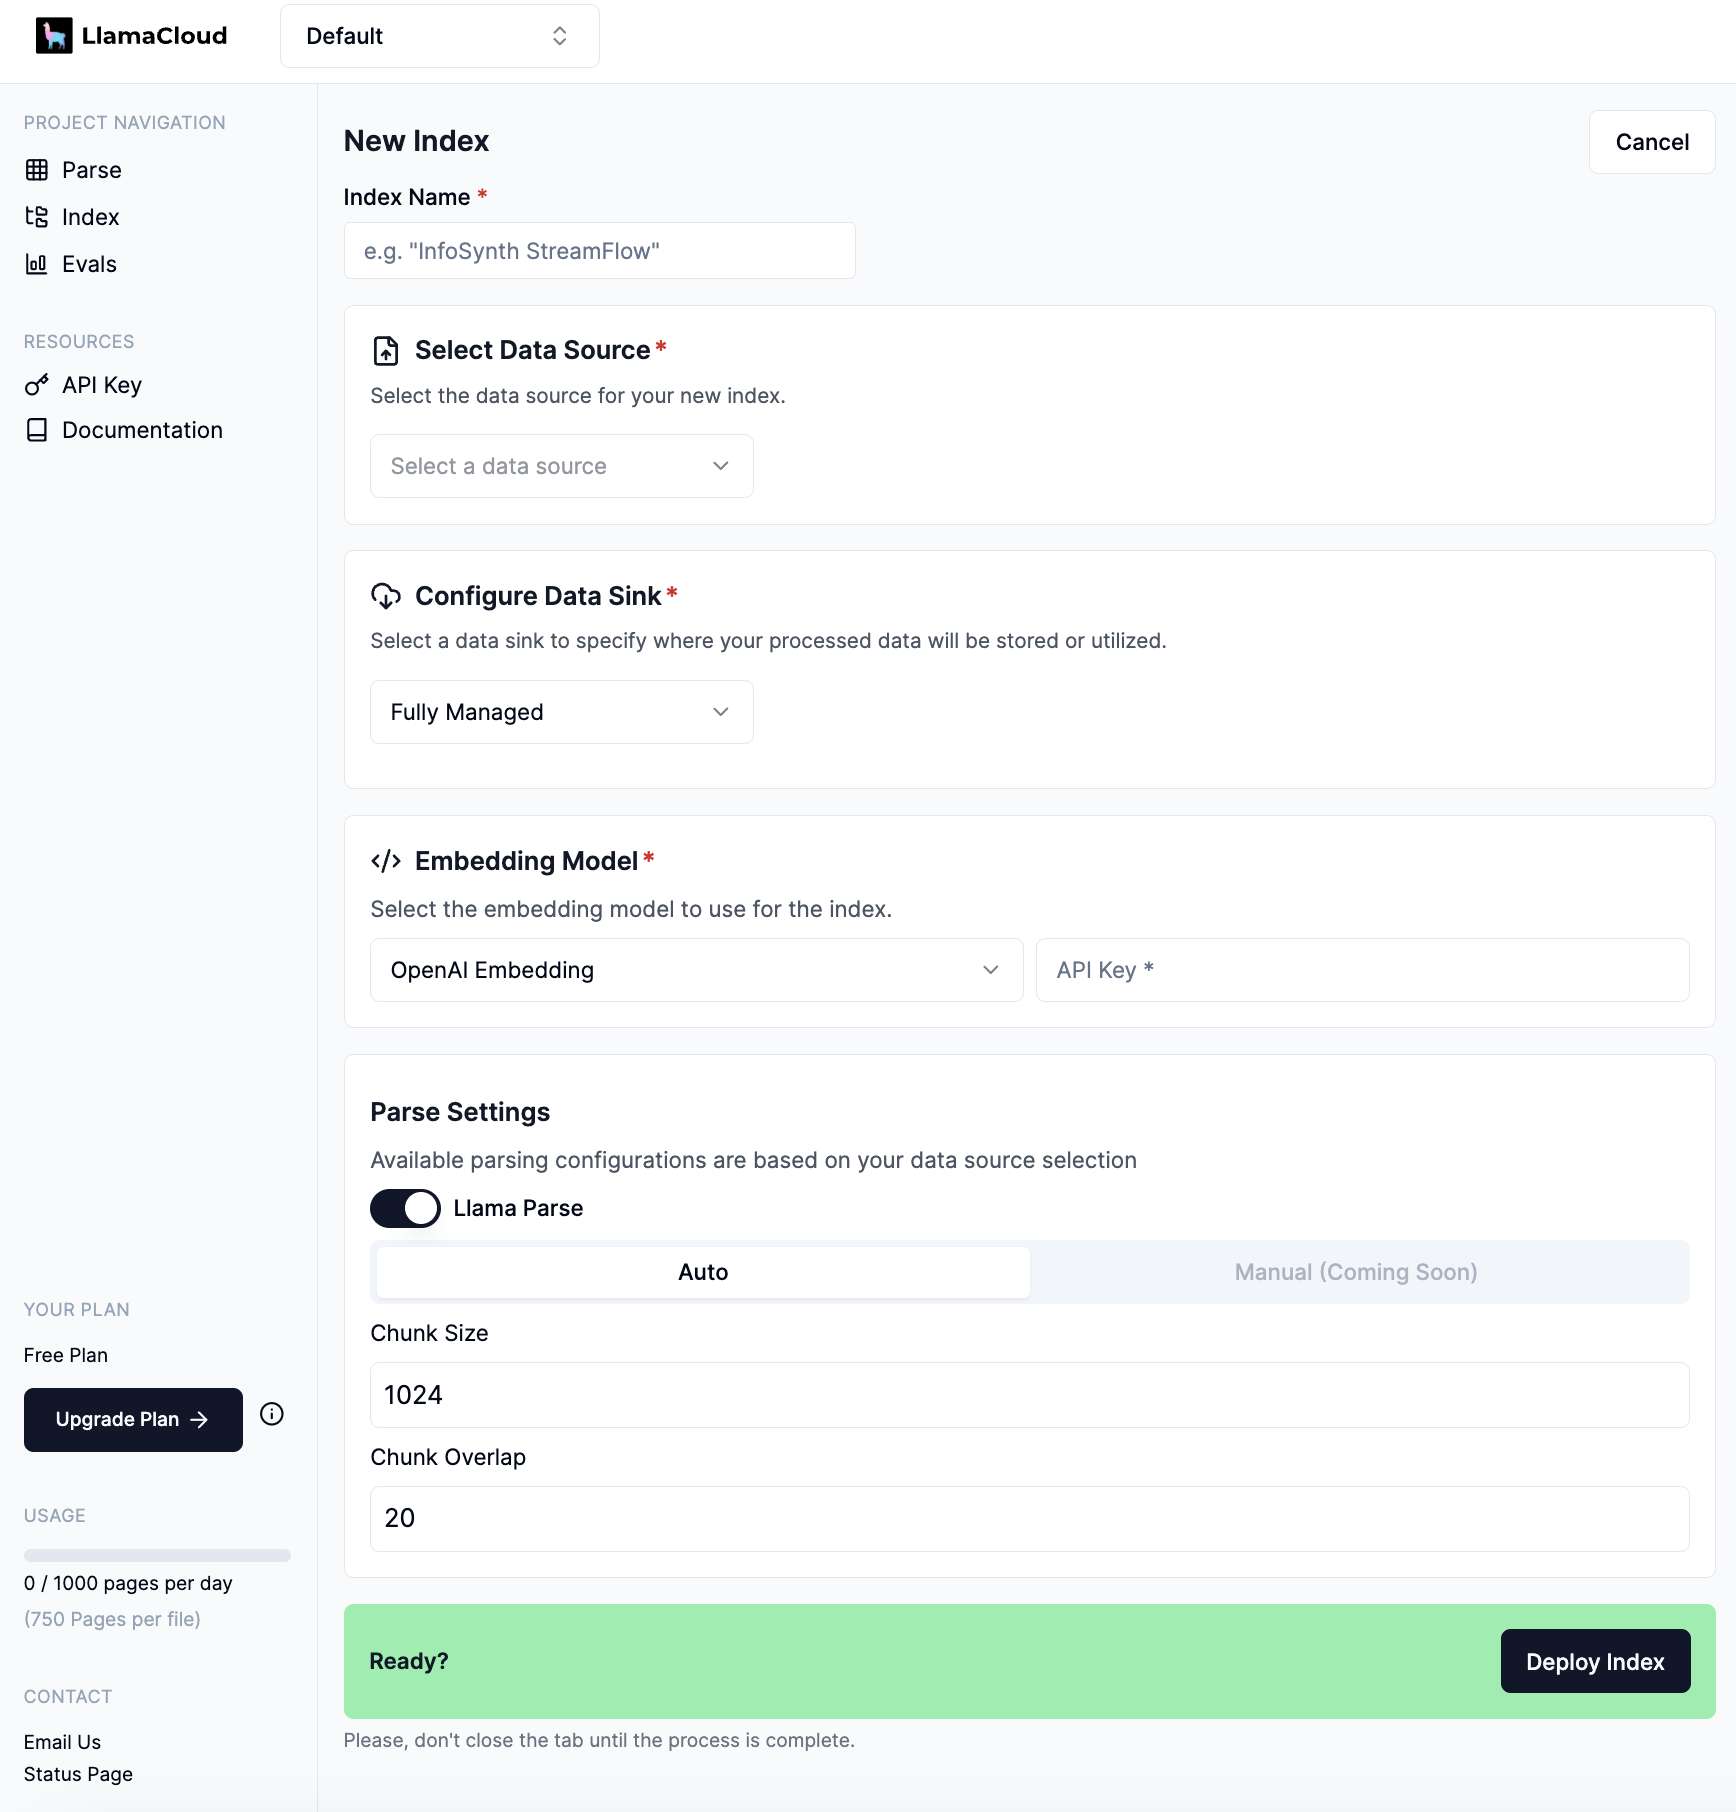
Configure data source
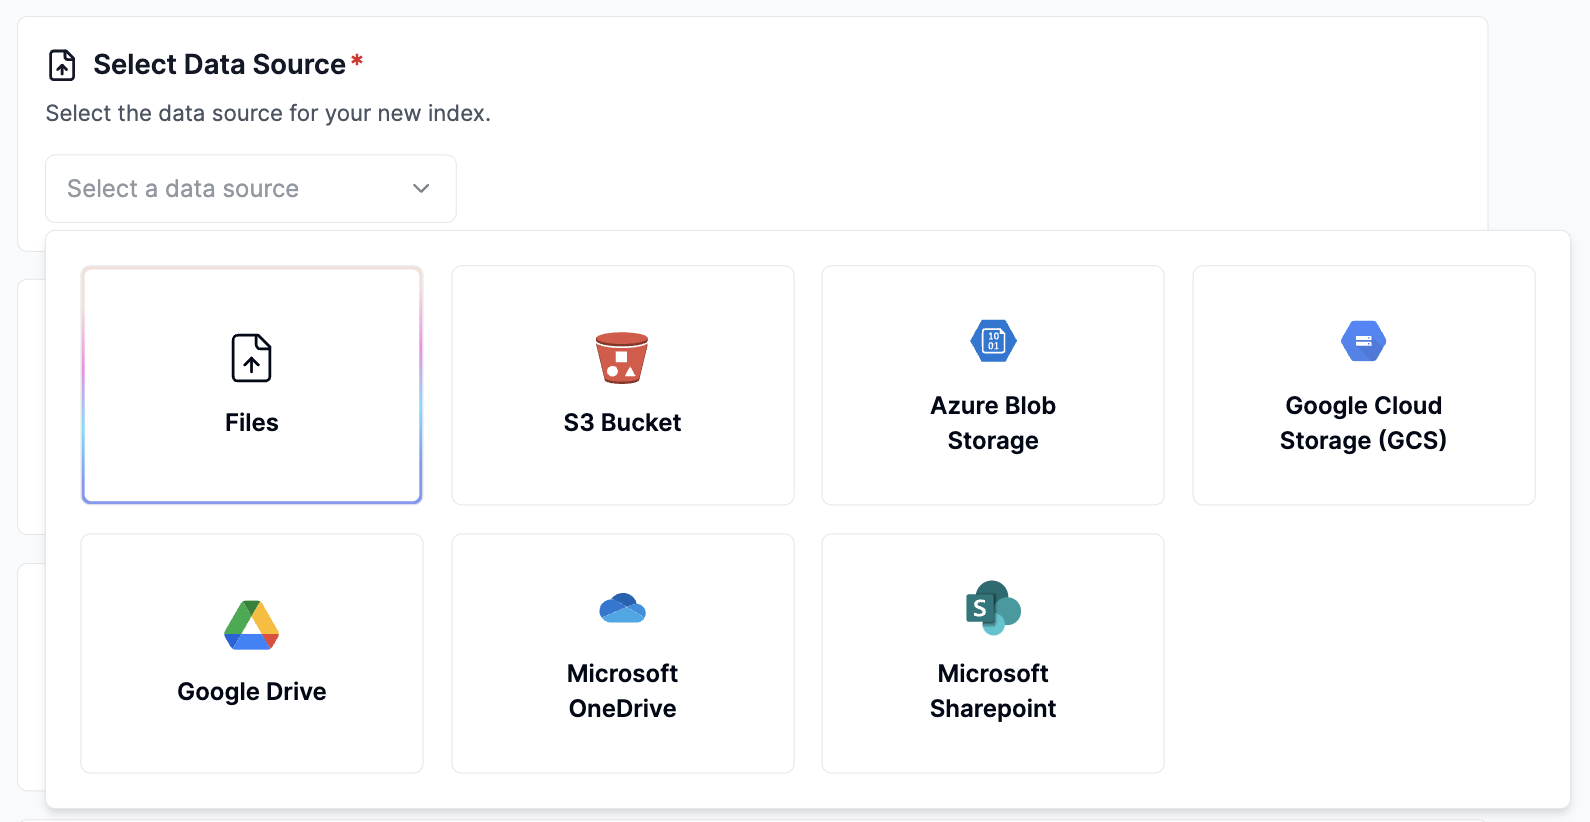
Click Select a data source dropdown and select desired data source.
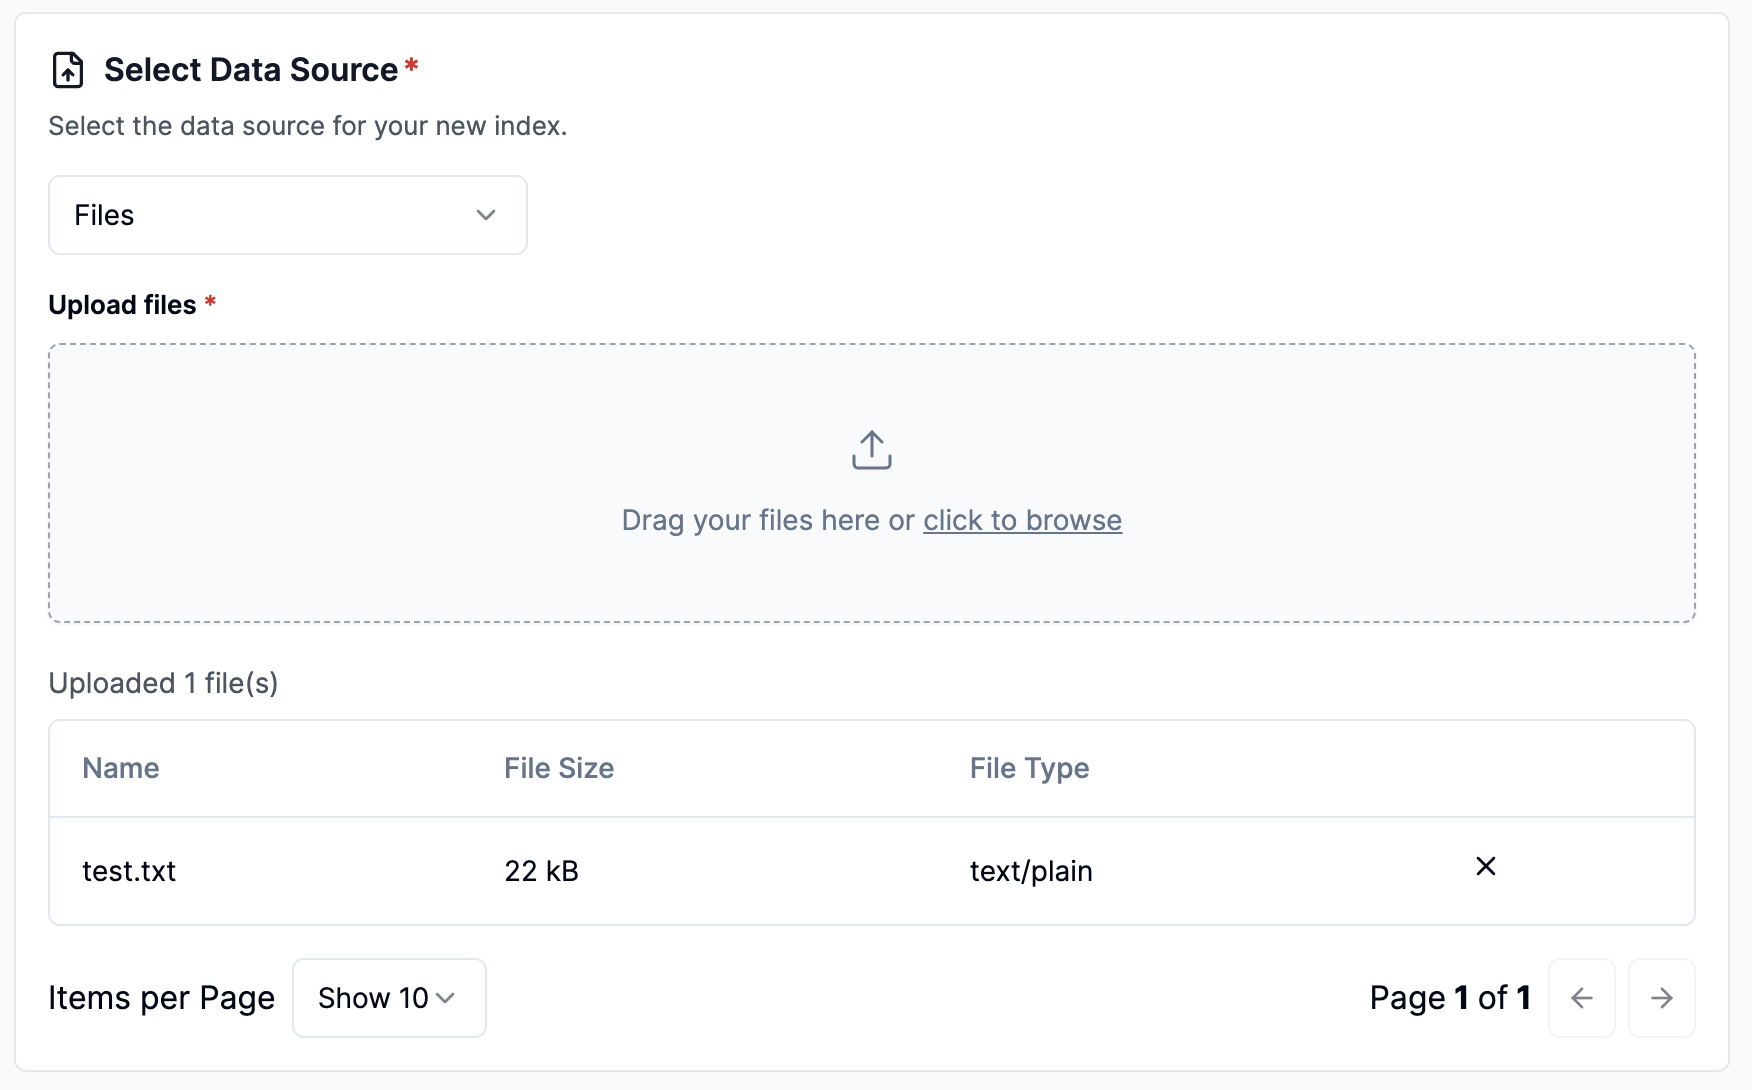
Specify data source credentials and configurations (or upload files).
See full list of supported data sources
Scheduled sync
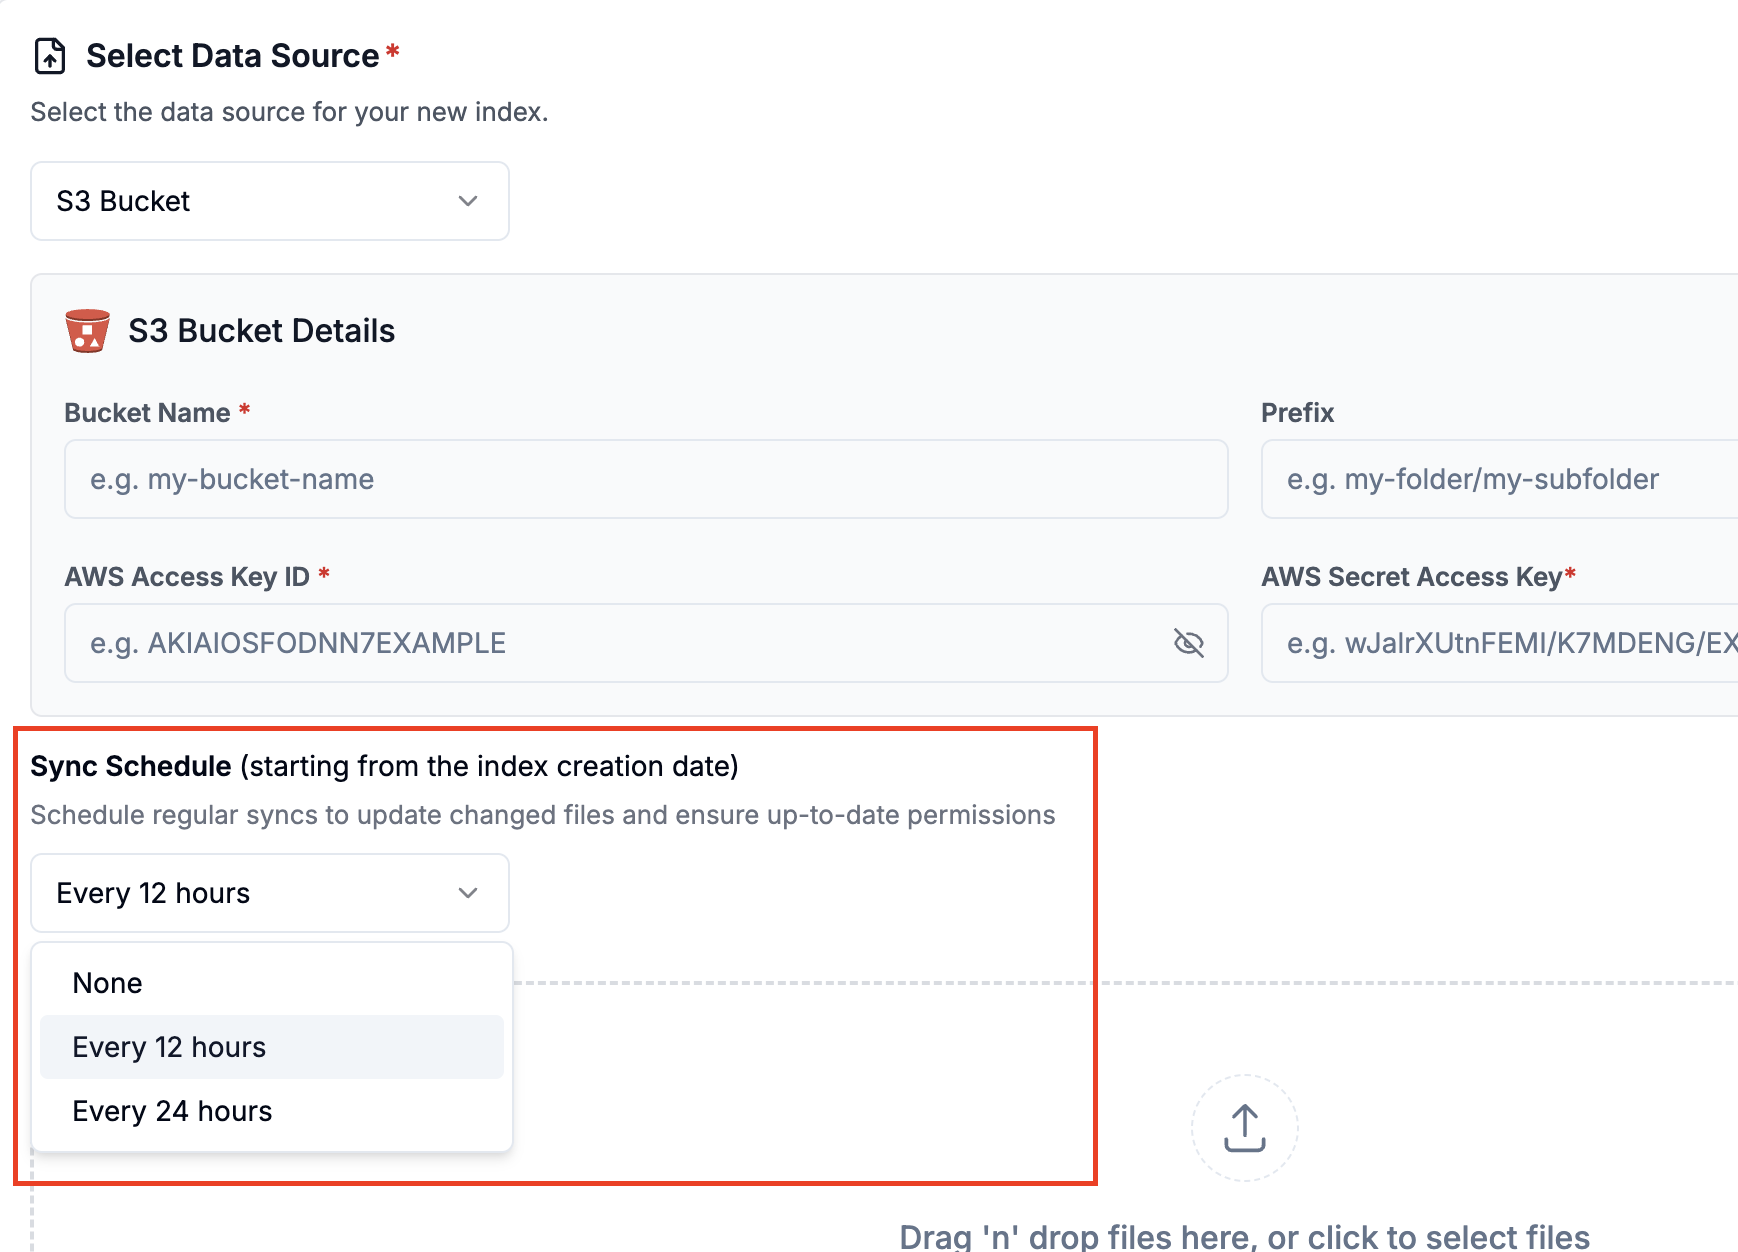
If you are using an external data source, you can schedule regular syncs to update changed files and ensure your index is always up to date. The syncs start from the index creation date.
To enable scheduled sync, click on the dropdown under the data source details and select a frequency. Only no scheduled sync, 6 hours, 12 hours and 24 hours are available.
Please contact us if you need more granular syncing options.
Configure data sink
Click Select a data sink dropdown and select desired data sink.
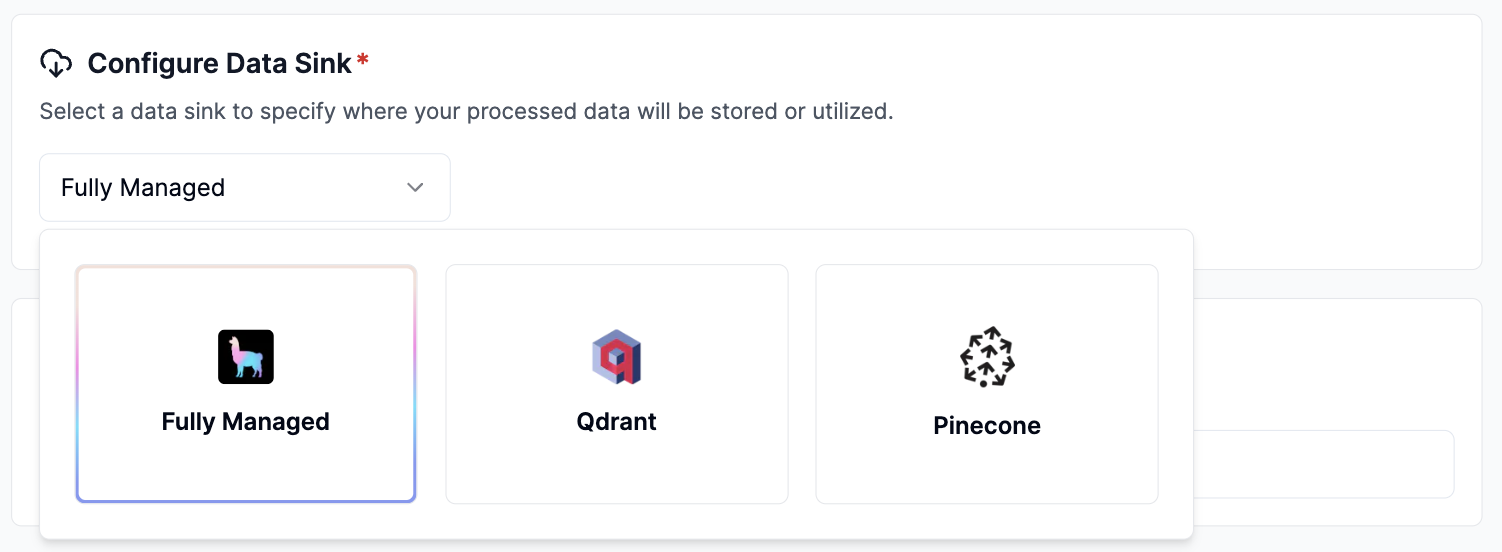
See full list of supported data sinks
Configure embedding model
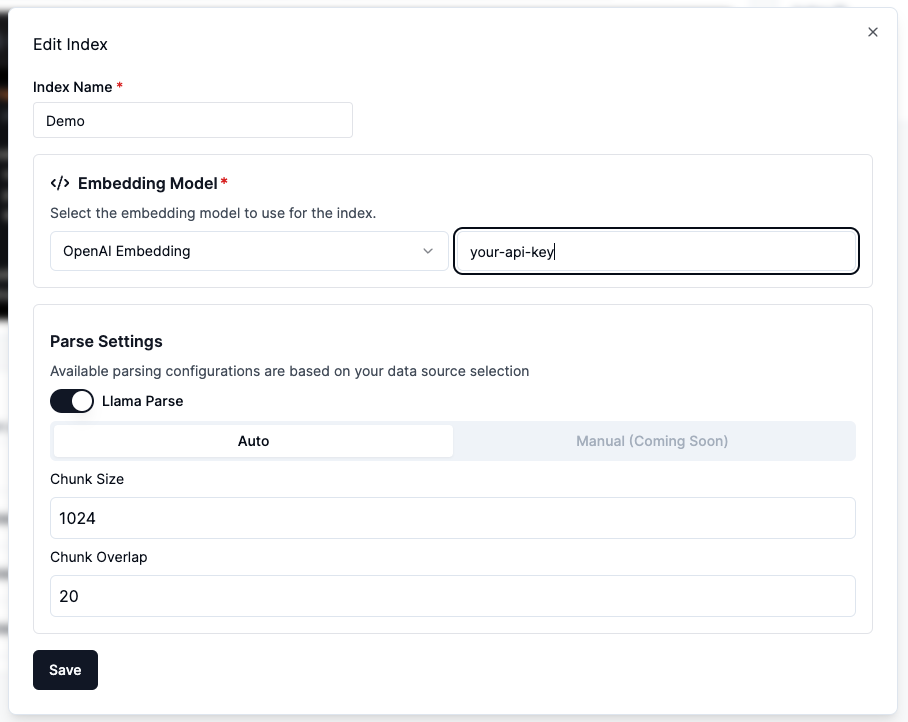
Select OpenAI Embedding and put in your API key.
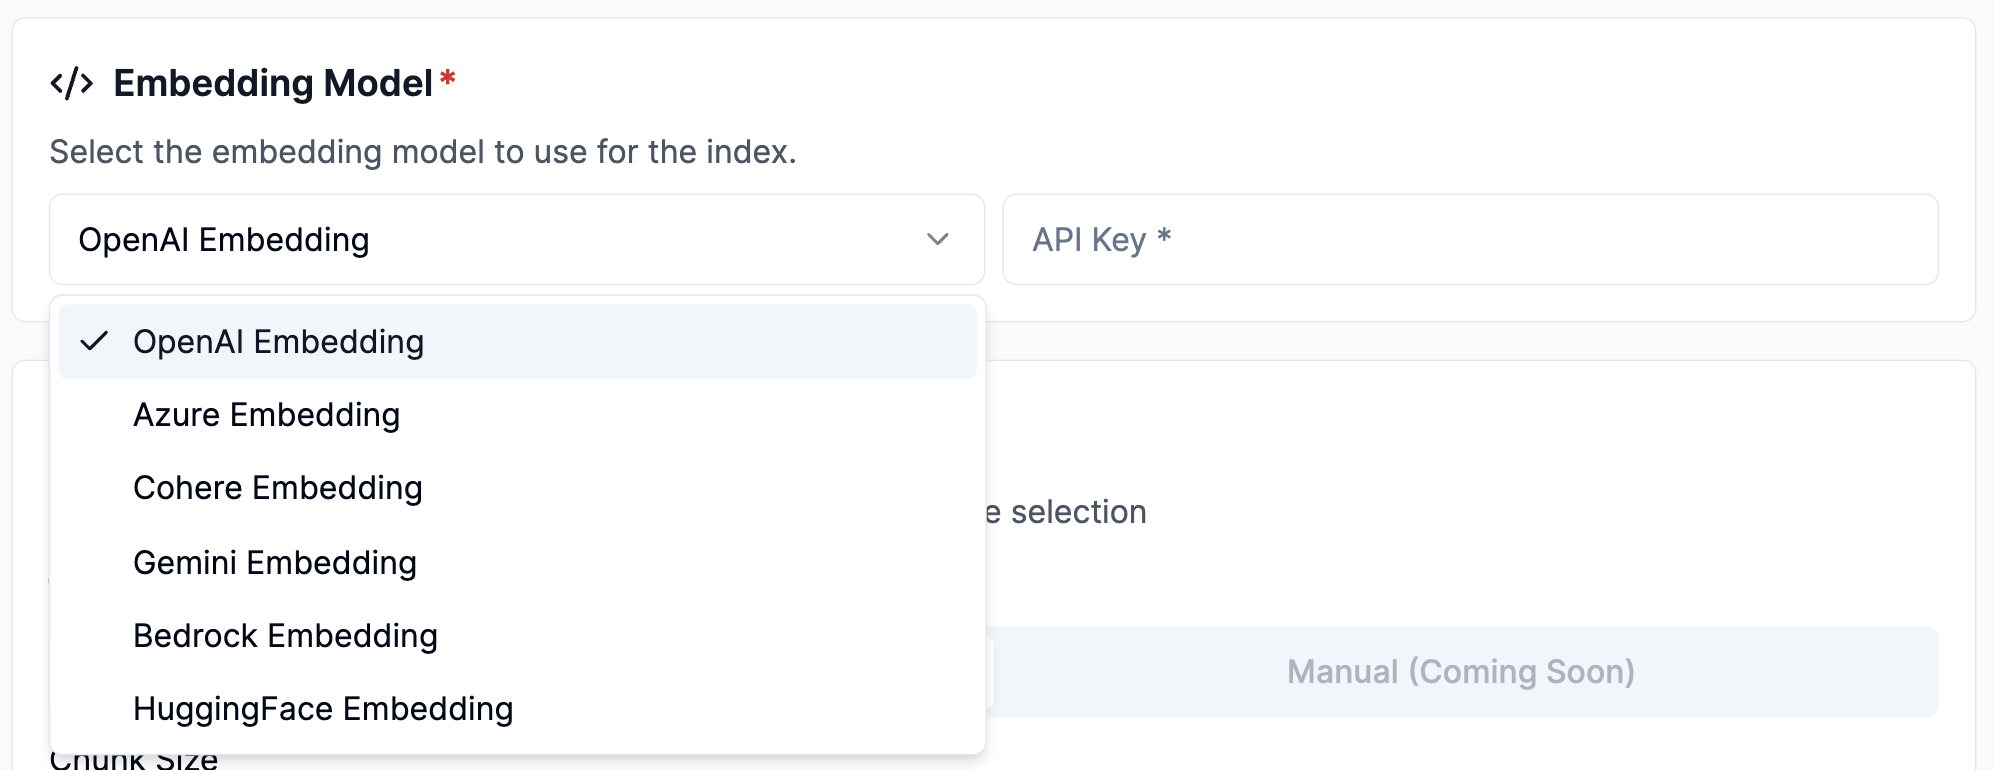
See full list of supported embedding models
Configure parsing & transformation settings
Toggle to enable or disable Llama Parse.
Select Auto mode for best default transformation setting (specify desired chunks size & chunk overlap as necessary.)
Manual mode is coming soon, with additional customizability.
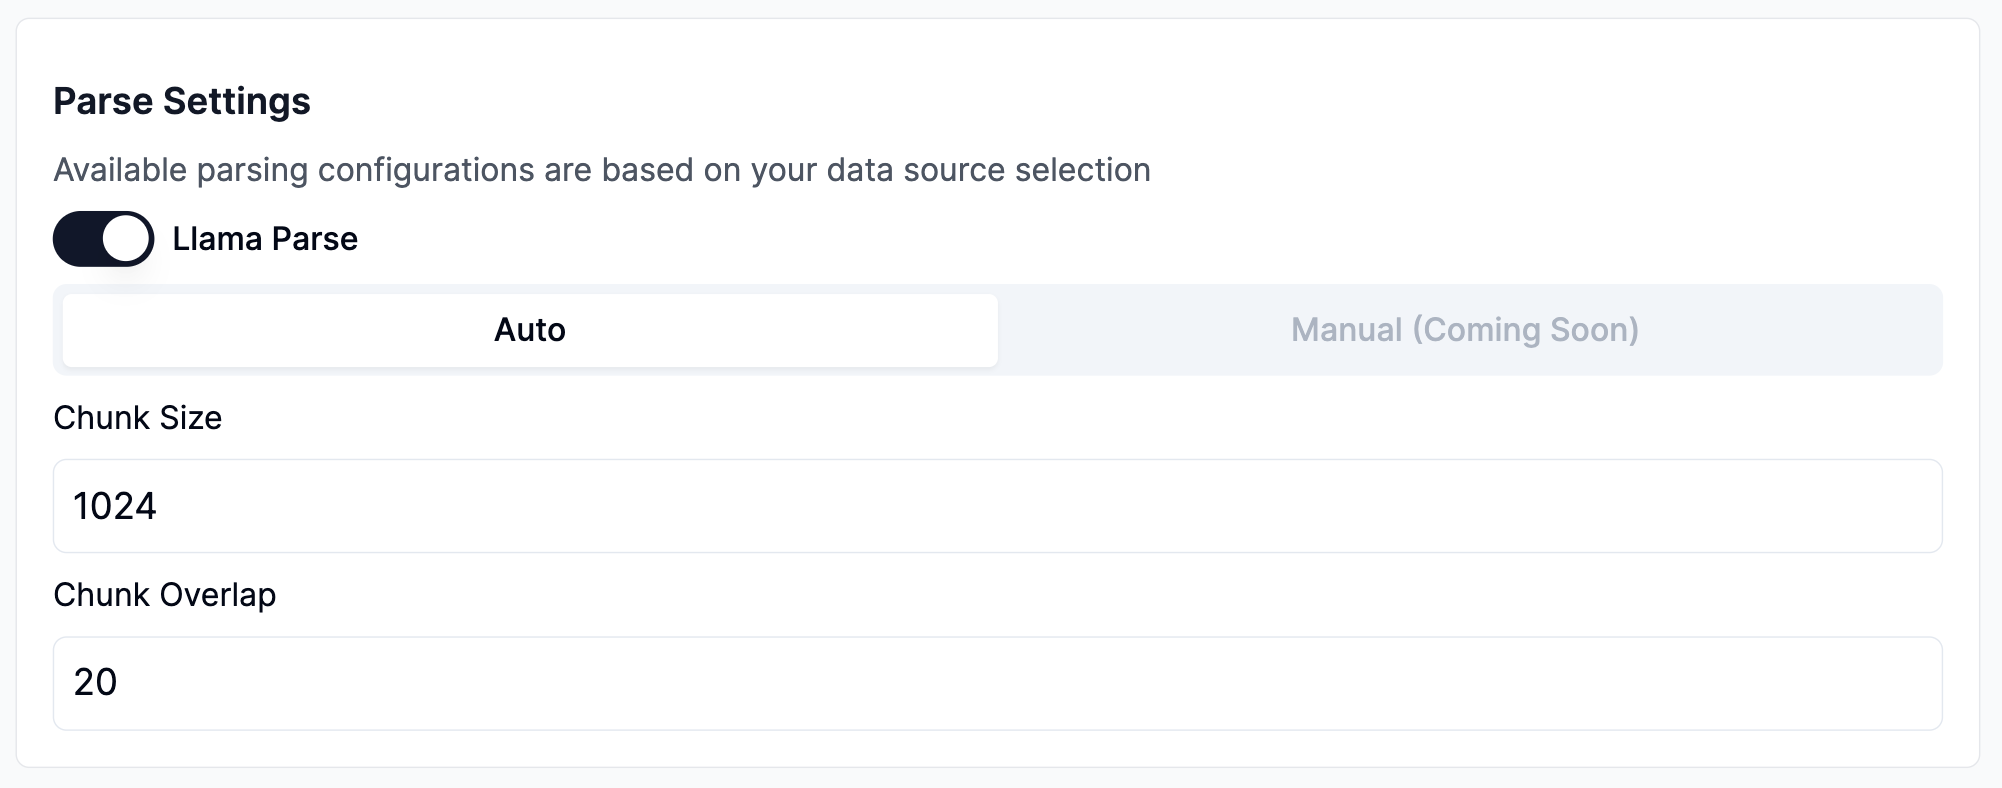
See parsing & transformation details
Deploy index
After configuring the ingestion pipeline, click Deploy Index to kick off ingestion.

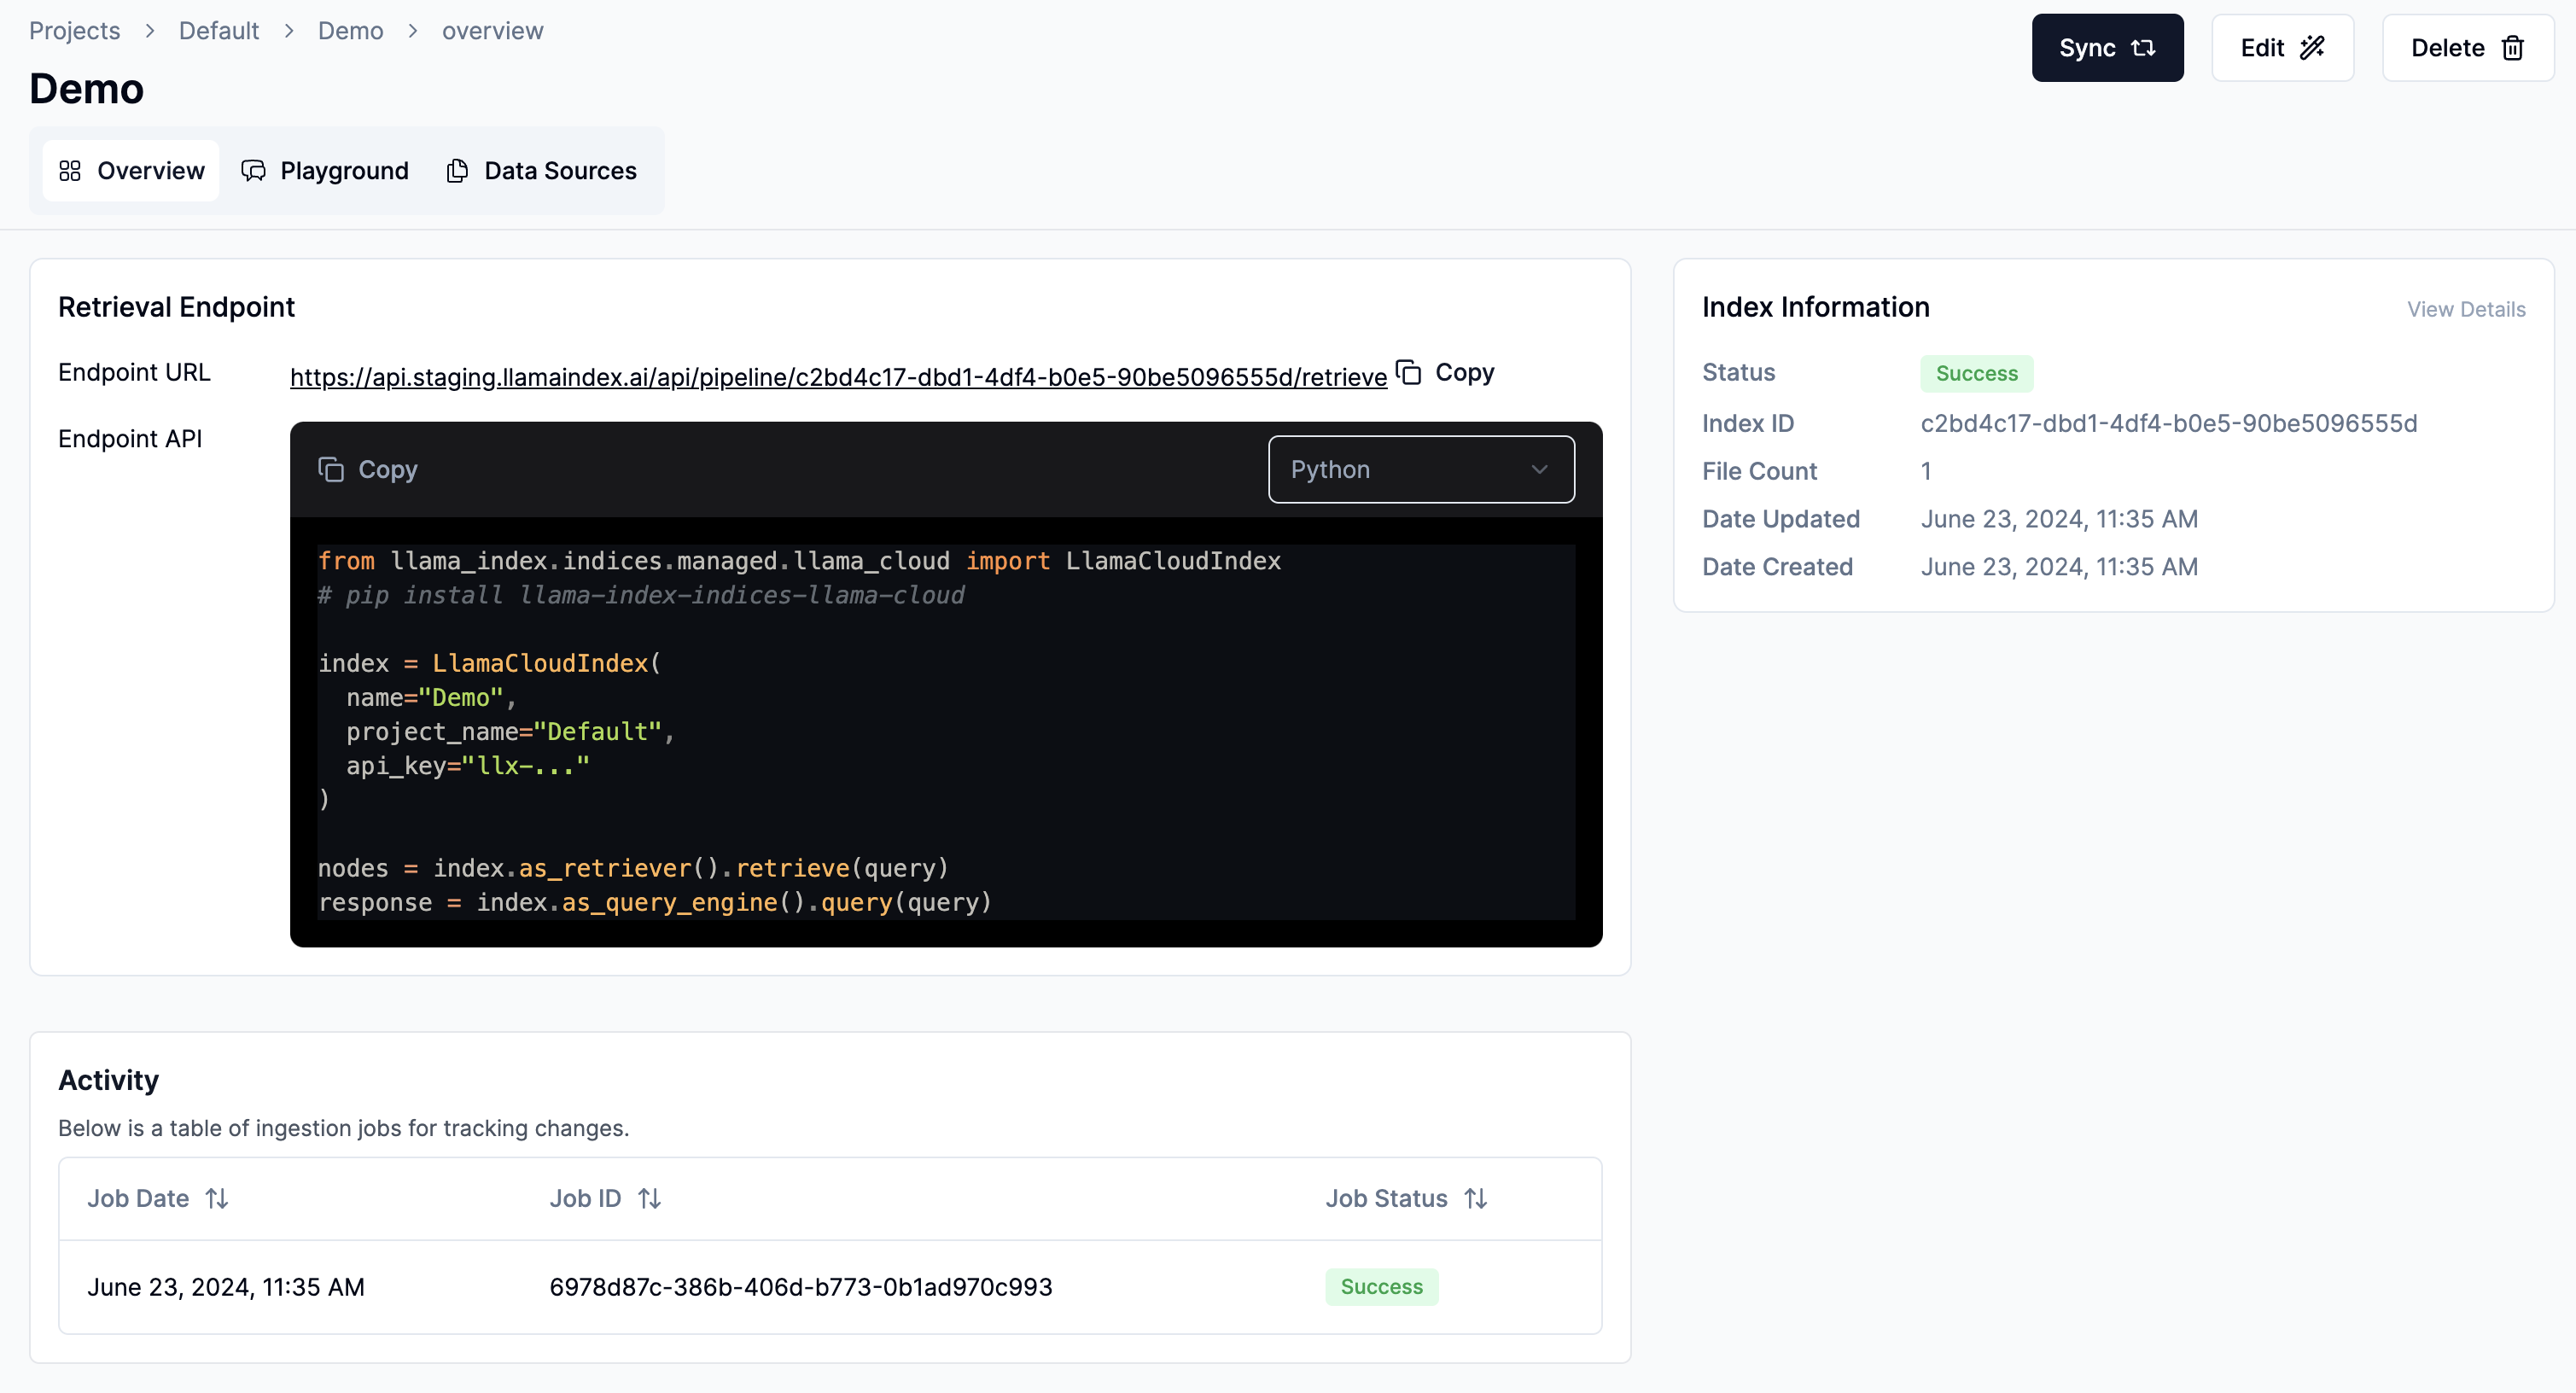
You should see an index overview with the latest ingestion status.
Manage existing index
Update files
Navigate to Data Sources tab to manage your connected data sources.
You can upsert, delete, download, and preview uploaded files.

Sync index
Click Sync button on the top right to pull upstream changes (data sources & files) and refresh index with the latest content.
Edit index
Click Edit to open up modal for configuring ingestion settings.
Delete index
Click Delete button to remove the index.
Note that this will not delete the uploaded files and previously registered data sources.
Configure scheduled sync frequency
You can configure the scheduled sync frequency of your data source by going to the Data Sources, then scrolling down to the Connectors section,
and clicking on the Settings icon on the right of the data source details.

Then, on the modal that pops up, you can select the desired sync frequency.
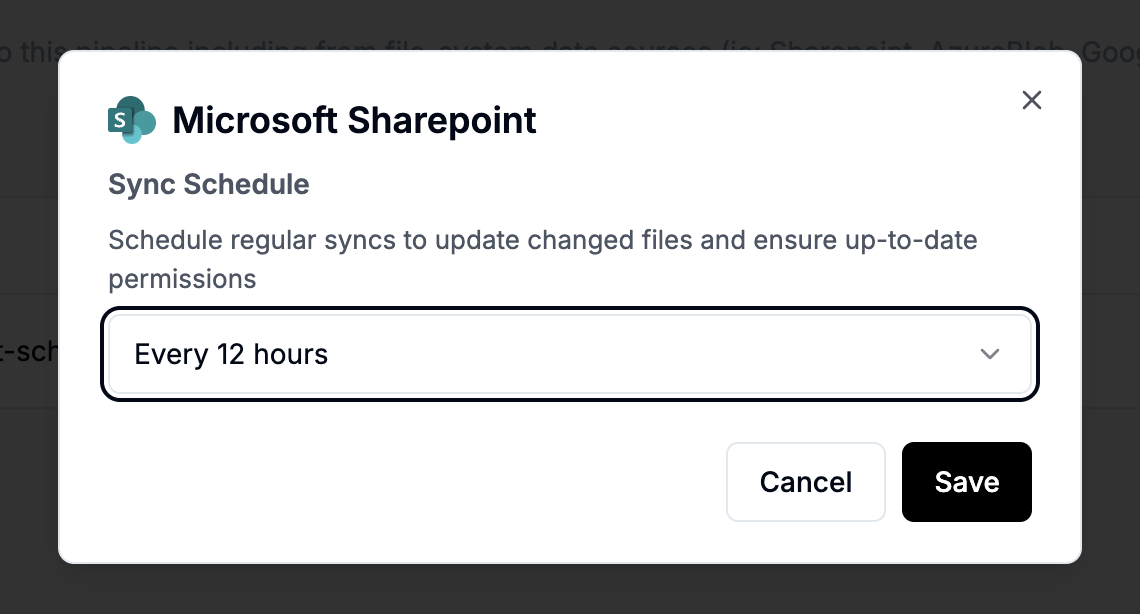
For more details on scheduled sync, including how the sync timing works, refer to the Scheduled sync section earlier in this page.
Observe ingestion status & history
Navigate to index overview tab. You should see:
- the latest ingestion status on the
Index Informationcard (top right), and - ingestion job history on the
Activitycard (bottom left).
Test retrieval endpoint
Navigate to Playground tab to test your retrieval endpoint.
Select between Fast, Accurate, and Advanced retrieval modes.
Fast: Only dense retrievalAccurate: Use hybrid search with dense & sparse retrieval and re-rankingAdvanced: Full customizability for tuning hybrid search and re-ranking
Input test query and specify retrieval configurations (e.g. base retrieval and top n after re-ranking) and click Run button to see preview for retrieved nodes.
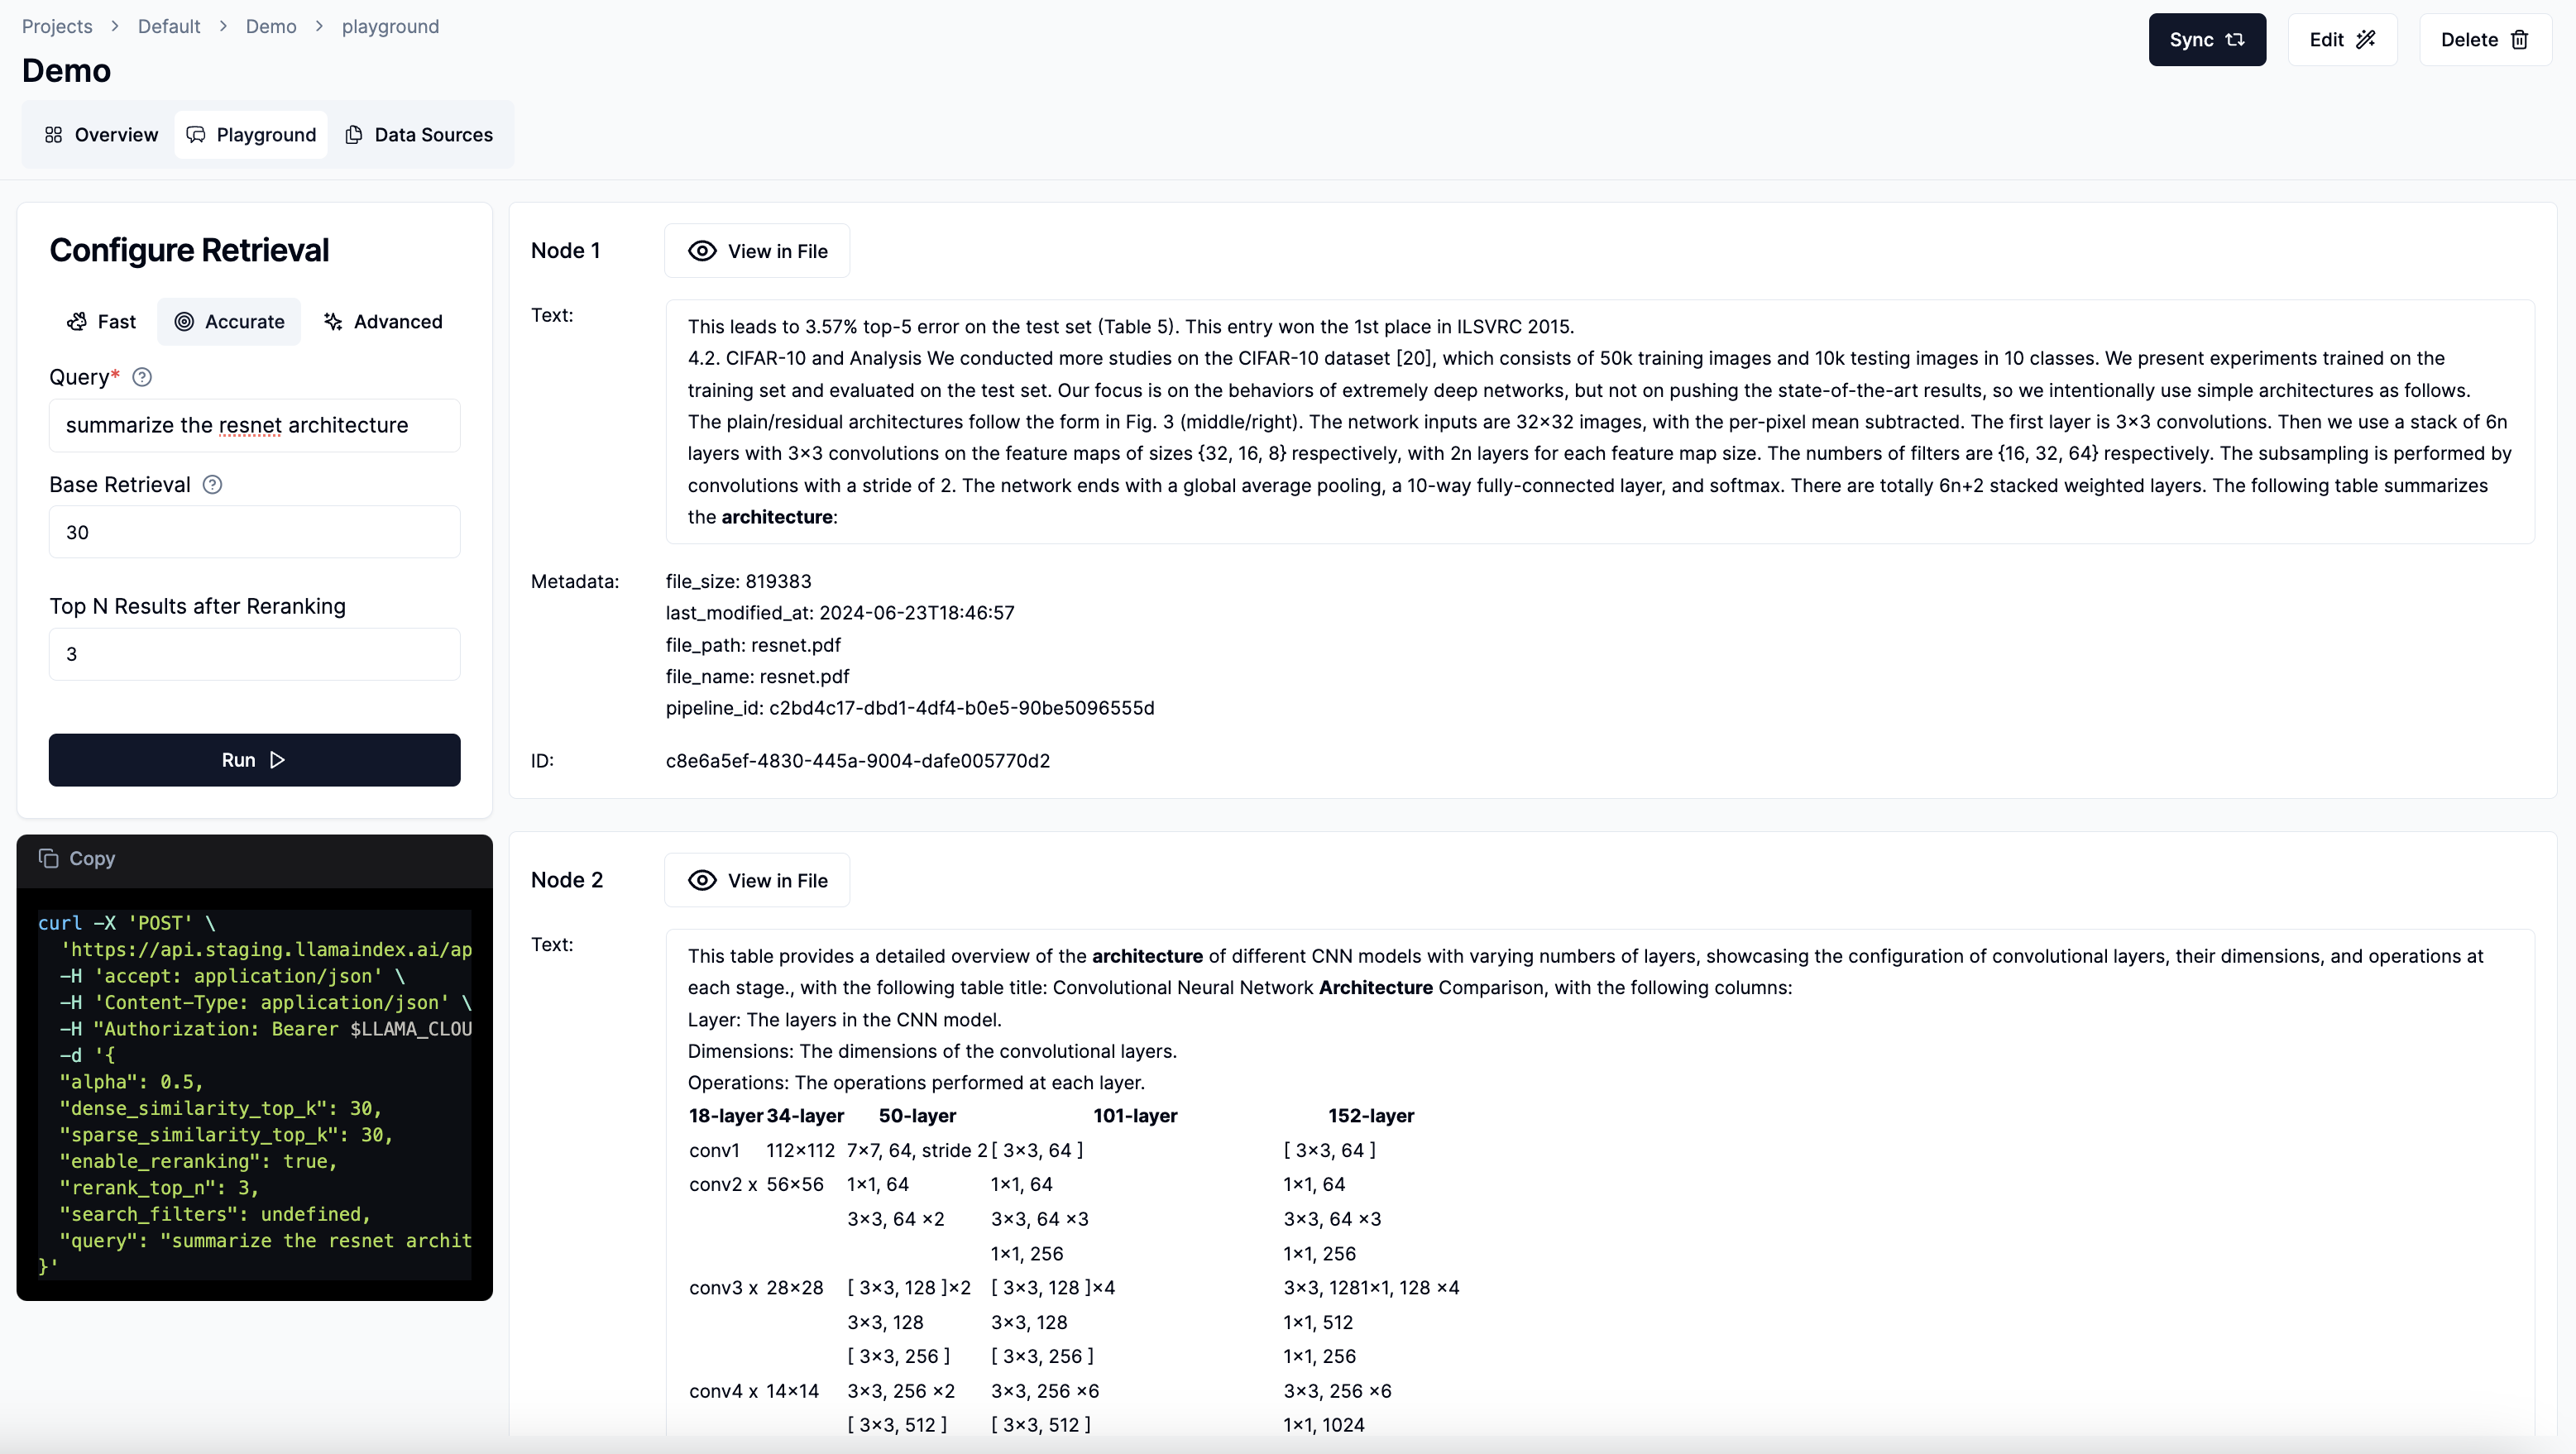
Click Copy from bottom left panel to make direct REST API calls to the retrieval endpoint.